CAUTION!! Typically you don't want to remove the Adapter (Sleeve) along with the Rotary Hook. Before continuing make sure these are the instructions you need to follow. An example of a time when you might want to remove the Adapter is if you are getting a Z Bind. An example of a time when you would not want to remove the Adapter is for a Rotary Hook replacement. If you need to replace the Rotary Hook on an EMT16Plus or an EMT16 follow the instructions in the Removing And Replacing The Rotary Hook On The EMT16 And EMT16Plus article.
Removing the Hook with Adapter (Sleeve):
1. Turn your Melco Machine off.
2. Remove the Needle Plate, Hook Guard and Rotary Hook Support.


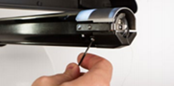

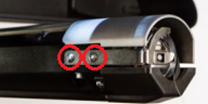
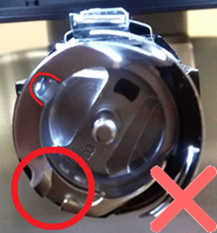
3. Loosen (do not remove) the two (2) timing set screws (highlighted in blue in the image below). If you don’t have access to the screws, spin the Z Shaft to rotate them to a position where you can loosen them.
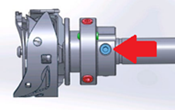
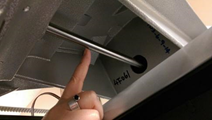
The picture on the left is the Timing set screws highlighted blue, the picture on the right is the Z Shaft how it’s visible to a user.
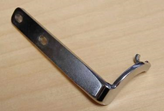
4. Pull the Rotary Hook with Adapter off the machine.
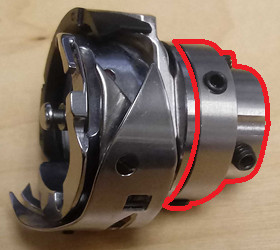
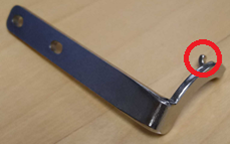
This is the Rotary Hook; the highlighted section is the Adapter (aka "Sleeve").
Reinstalling the Rotary Hook with Adapter (Sleeve):
1. Spin the Z Shaft till the active needle is at its highest position.
2. Slide the Rotary Hook with Adapter onto the machine and push it as far back as it can go. Position the hook point to be at the 1 o’clock position before tightening each of the two (2) timing set screws.
NOTE: The correct Hook Timing will have the Hook Point closer to 11 o’clock. To make sure we are not breaking needles when bringing it down with power we want the hook point to be closer to 1 o’clock, we will correct this later.
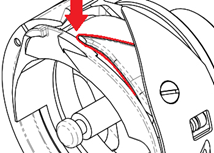
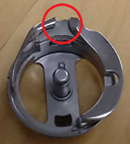
This is the Hook Point.
3. Verify your Hook Point is at the 1 o’clock position while your needle is at its highest position.
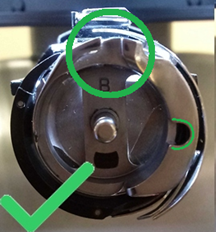
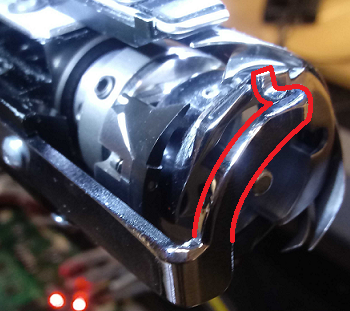
4. Spin the Hook Basket so the notch the Rotary Hook Support fits into is at the 12 o’clock position, and the C shape that the Bobbin Case snaps into is at 3 o’clock.
5. Hold the Hook Basket in place while spinning the Z Shaft and check if there is a Z bind. If the needle hits the hook, repeat the steps of the reinstallation. If there is a Z bind after repeating the steps, you will need additional technical assistance. Here are the available Melco Technical Support options.
6. Fit the Rotary Hook Support into the notch on the Hook Basket.
7. Spin the Z Shaft and check if there is a Z bind. If there is a Z Bind, there is most likely a broken needle point or thread caught inside the hook basket. If you cannot find and clean what’s causing the bind, you will need additional technical assistance. Here are the available Melco Technical Support options.
8. Open the machine's OS software and turn your machine on.
9. Removing the Rotary Hook with Adapter will change critical measurements. Follow the steps in Rotary Hook Inspection And Adjustment Procedures For EMT16Plus And EMT16 for:
- Hook Timing
- Rotary Hook Support (Retaining Finger) Adjustment
- Completion: Reassembling Hook Covers and Needle Plate Centering