This article applies to the original Melco XT trimmer system only.
If the Knife or Selector are not set in their home position you might experience Thread Breaks or Missed Trims. Follow the steps below to set the correct home position.
1. Turn the machine off
2. Unplug Ethernet and Power cables.
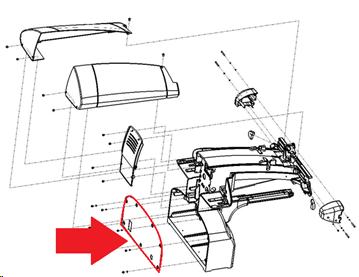
3. Remove the Lower Arm Rear Cover 30526-01.
4. Plug Ethernet and Power cables back in.
5. Remove the Needle Plate.
6. Turn the machine ON.
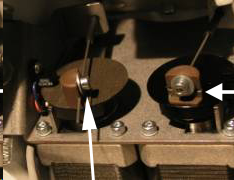
7. Locate the Trimmer Cable Blocks (Yokes) PN:32952-02, they are part of the Trimmer Drive Assembly PN: 32898.
If you are sitting behind the machine, the Yoke on the Right connects to the Knife.
If you are sitting behind the machine, the Yoke on the Left connects to the Selector.
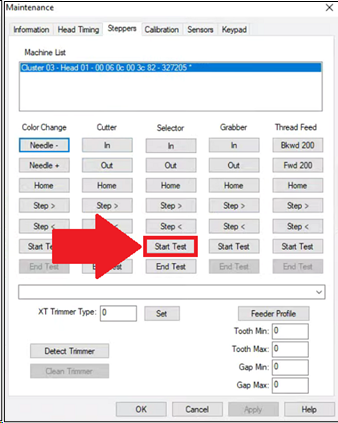
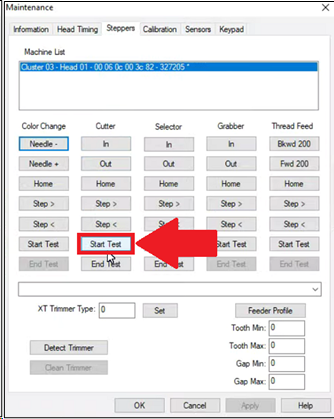
8. In the software go to Tools > Maintenance > Steppers > and click Start Test in the Selector column.
9. Visually confirm that the selector is moving, and click End Test. If the selector is not moving try to Power Cycle the machine.
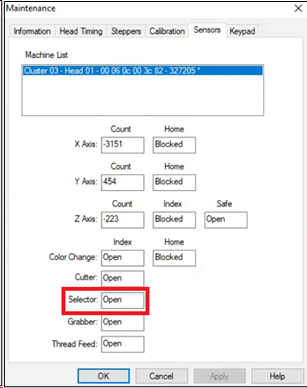
10. In the software go to Tools > Maintenance > Sensors > and confirm Selector says Open.
11. Confirm the motor on the left is at home. You should not be able to rotate it clockwise. It might click into place, but it should not rotate freely. At its home position it should rotate somewhat counterclockwise.
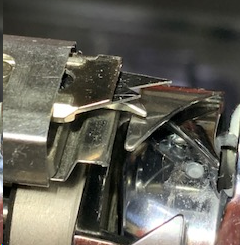
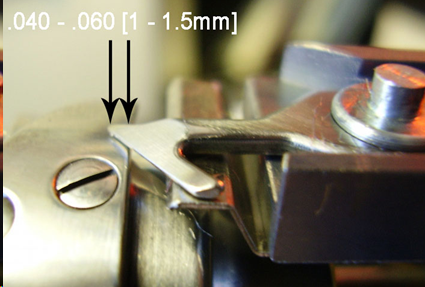
12. Inspect the Selector. Set the Selector to home by extending it 1mm - 1.5mm past the outer edge of the Hook. Most likely the Selector Channel will be centered on the plateau of the Under Presser, as in the picture below.
13. If the Selector is not at Home, loosen the screw on its Yoke and adjust the Push/Pull Cable until the Selector is at Home. Then tighten the screw on the Yoke.
14. In the software go to Tools > Maintenance > Steppers > and click Start Test in the Cutter column.
15. Visually confirm that the knife is moving, and click End Test.
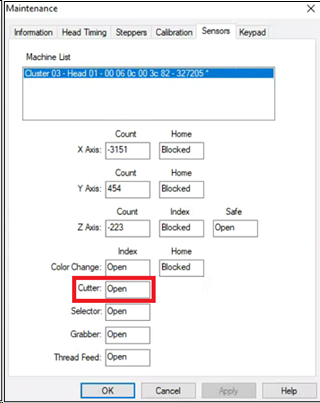
16. In the software go to Tools > Maintenance > Sensors > and confirm Cutter says Open.
17. Confirm the motor on the right is at home by turning it counter-clockwise. You should not be able to rotate it counterclockwise. It might click into place, but it should not rotate freely. At its home position it should rotate somewhat clockwise.
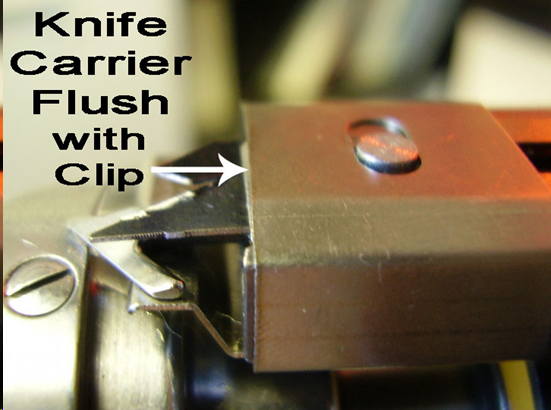
18. Inspect the Knife. The Knife Carrier PN: 32963-02 should be flush with the Trimmer Assembly PN: 32958.
19. If the Knife is not at Home, loosen the screw on its Yoke and adjust the Push/Pull Cable until the Selector is at Home. Then tighten the screw for the Yoke.
20. Rotate both Yokes and confirm the correct movement on the front of the machine for each. The movement of both should feel smooth.
21. In the software go to Tools > Maintenance > Steppers > and click Out and then Home for both the Selector and the Cutter columns. Verify that the Home position of each is correct; in the Sensors menu both should read open.