The ACAT Cerliani style hook is available on ShopMelco: PN#33724.
Removing the Hook:
- Turn your Melco Machine off.
- Remove the Needle Plate, Hook Guard and Rotary Hook Support.


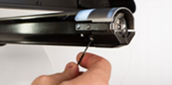

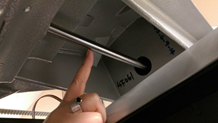
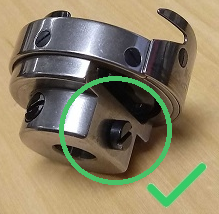
- Loosen the three screws that attach the Hook to the machine. If you don’t have access to the screws, spin the Z Shaft to rotate them to a position where you can loosen them.

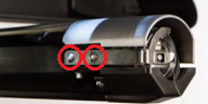
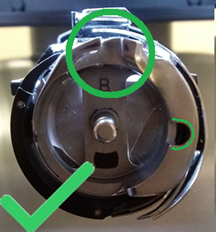
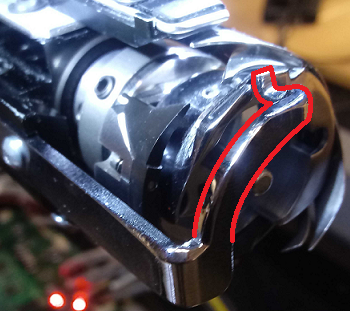
Timing set screws highlighted green, Z Shaft from the parts manual, Z Shaft how it’s visible to a user.
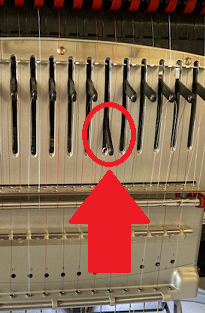
- Pull the Rotary Hook off the machine.
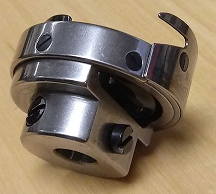
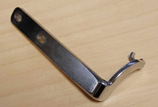
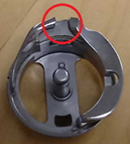
This is the Rotary Hook.
Reinstalling the Rotary Hook:
1. Make sure your Melco Machine is powered OFF.
2. Spin the Z Shaft till the active needle is at its highest position.
3. Verify that the Take Up Lever is up. If it is down, spin the Z Shaft 180 degrees (half of one rotation).
4. Put the Rotary Hook back on the machine and position the hook point to be at the 1 o’clock position before tightening the raised screw that attaches the Hook to the machine.
NOTE: The correct Hook Timing will have the Hook Point closer to 11 o’clock. To make sure we are not breaking needles when bringing the needle down with power we want the hook point to be closer to 1 o’clock, we will correct this later.
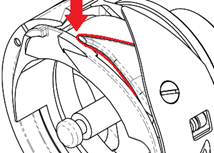
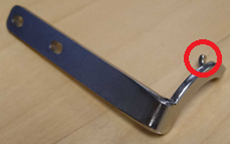
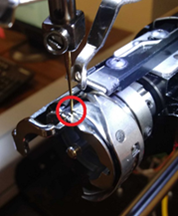
This is the Hook Point.
5. Verify your Hook Point is at the 1 o’clock position while your needle is at its highest position.
6. Tighten the raised screw.
7. Spin the Hook Basket so the notch the Rotary Hook Support fits into is at the 12 o’clock position, and the C shape that the Bobbin Case snaps into is at 3 o’clock.
8. Fit the Rotary Hook Support into the notch on the Hook Basket.
9. Check for a Z Bind. If there is no bind, continue to the next step. If the needle hits the hook check the Needle to Hook Gap or repeat the steps by removing and reinstalling the hook again. If you cannot adjust the hook so it doesn’t bind, you will need additional technical assistance. Here are the available Melco Technical Support options.

10. Turn ON your machine.
11. Reinstallation of the Rotary Hook is now complete but will have changed critical measurements so you must follow the Hook Adjustments procedure for XTS and XT machines before sewing with the machine.