1. Make sure that the Melco OS program is running on your computer and your Melco embroidery machine is powered ON.
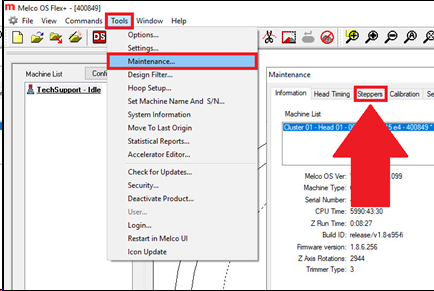
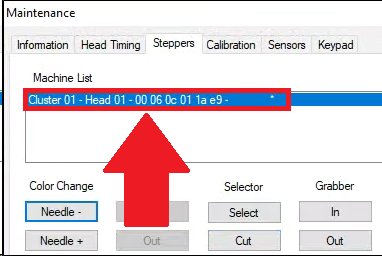
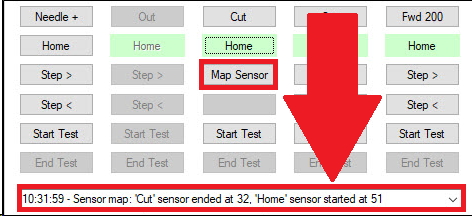
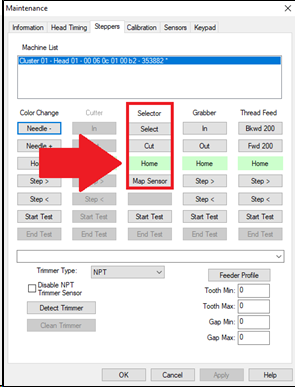
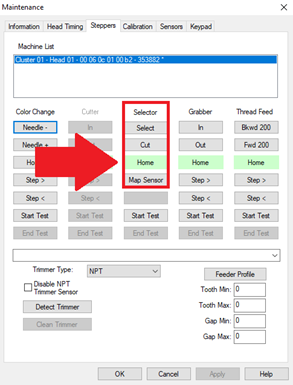
2. Make sure the correct machine is selected and Map the selector. Go to Tools > Maintenance > Steppers > push Map Sensor.
If the result is out of spec you will need to continue with the steps for Setting Connecting Link Assembly To Home.
If the result is in spec, you might not need to follow additional steps for Setting Connecting Link Assembly To Home. However, following and verifying the steps below can improve the trim function.
- The ‘Cut’ Sensor should end at 32 ±1.
- The ‘Home’ Sensor should start at 52 ±1.
3. Remove the Needle Plate Assembly.
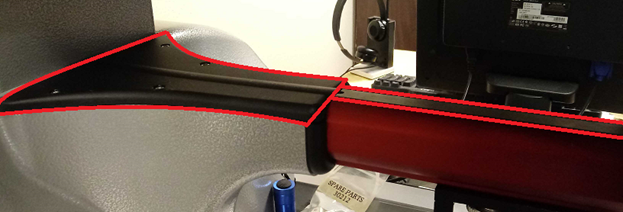
4. Remove the Lower Arm Extension Cover and Lower Arm Rear Cover.

5. In order click the; Cut, Select, and Home
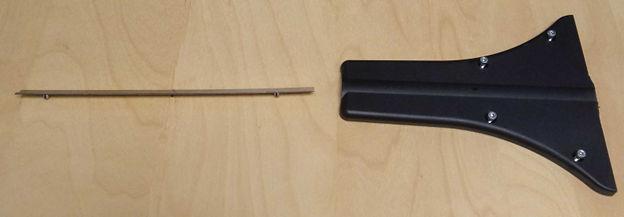
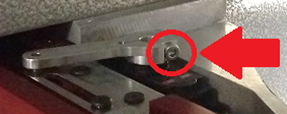
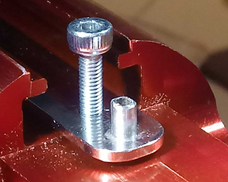
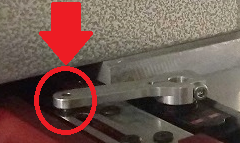
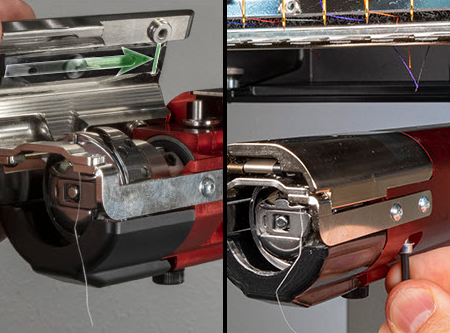
6. After pushing the Home button, try to engage the screw used to attach the needle plate into the hole at the front of the NPT Connecting Link Assembly.


7. If the screw drops down into the arm of the machine without moving the linkage, the linkage is at home, skip to step 19. If the screw Does Not drop into the arm of the machine, the linkage is not at home.
8. Loosen the allen screw on the NPT Drive Arm.
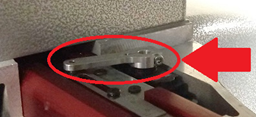
9. Check that the NPT Drive Arm is slotted properly into the NPT Connecting Link Assembly.
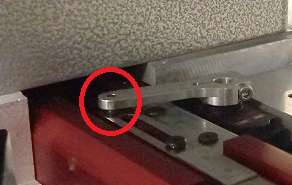

10. Manually move the NPT Connecting Link Assembly until you can engage the screw used to attach the needle plate into the hole at the front of the NPT Connecting Link Assembly.
11. In the operating software Press Cut and listen for the motor, to confirm movement.
12. Press Select, listen for movement.
13. Press Home, listen for movement.
14. At Home, tighten the screw on the NPT Drive Arm. Push down on the NPT Drive Arm holding it in place so it doesn’t shift while tightening the screw.
15. Remove the screw from the front of the NPT Connecting Link Assembly.

16. Press Cut, Select, and Home again, and watch for movement.
17. At Home, try to engage the screw into the front of the NPT Connecting Link Assembly again, if it doesn’t engage easily without moving the linage repeat the steps starting with step 8.
18. Remove the screw from the front of the NPT Connecting Link Assembly. Be carful not to move the linkage, it should stay in a position where the screw could easily fall into the arm of the machine.
19. Install the Needle Plate Assembly, make sure the knife is homed.
20. Check if color of the Home button matches expectation when you click on the following:
- Cut = Green
- Select = Red
- Home = Green
21. If the colors do not match expectation, you will need additional technical assistance. Here are the available Melco Technical Support options.
22. Click the Map Sensor
The ‘Cut’ Sensor should end at 32 ±1.
The ‘Home’ Sensor should start at 52 ±1.
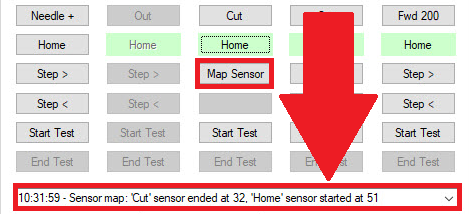
23. If the numbers above are outside of spec, you will need additional technical assistance. Here are the available Melco Technical Support options.
24. Install the Lower Arm Extension Cover and Lower Arm Rear Cover.
25. Setting the NPT Connecting Link Assembly Home is complete.