Lack of maintenance or adverse environments may cause excessive lint and/or thread debris to build up inside the module causing it not to trim properly. If this occurs use the following procedure to remove and clean the module.
1. Remove the Needle Plate.

2. Press Trace + Adjust to extend the ACA for removal. Note: If the knife cannot extend and retract properly you might not get an error when it expends, check for an errors in log when the knife retracts.

3. Use a screwdriver to remove the E-clip from the Trimmer Pin. Do not try to remove the E-clip by pushing up, instead push it away from the gap on the back of the clip. Be careful to not lose the E-clip PN: 001955-07.
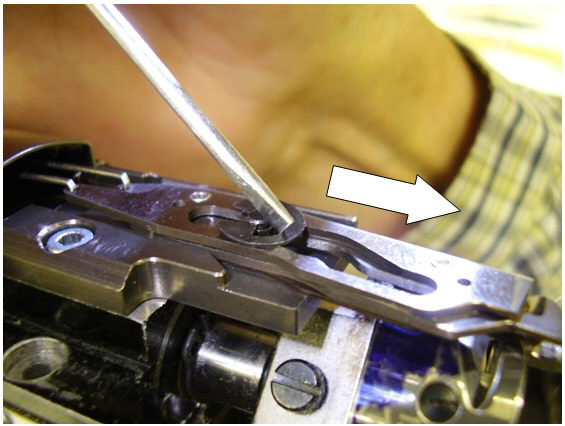
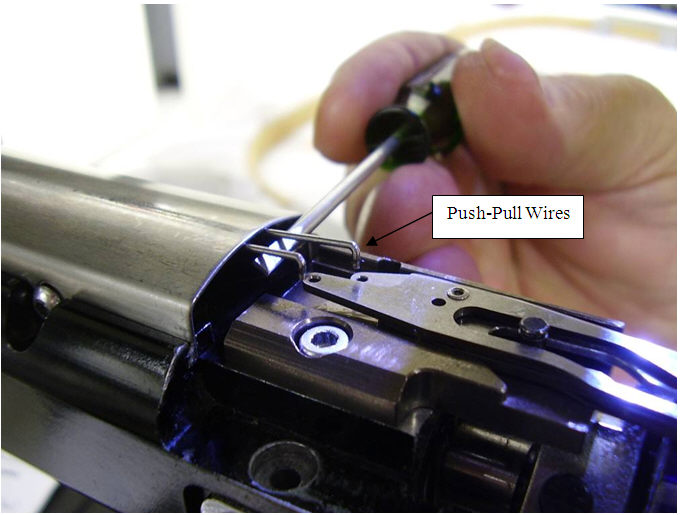
4. Using a small screwdriver or other tool lift up on the two Push-Pull Wires, careful not to bend them, and remove the ACA Trimmer Module.
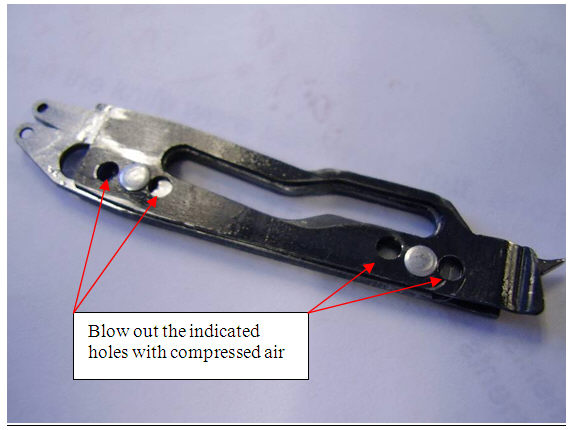
5. Using compressed air blow out the holes on the bottom side of the module to remove any trapped lint or thread debris. If you are replacing the ACA with a new one, skip this step.
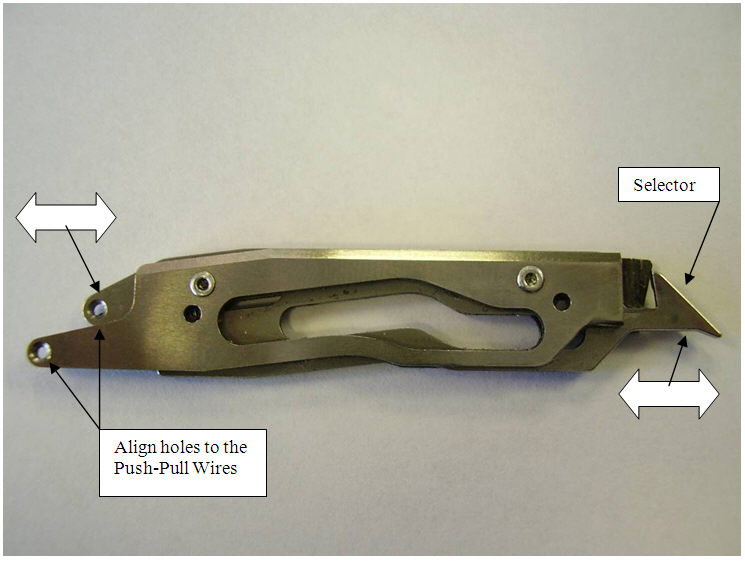
6. Pre-adjust the ACA Trimmer Module so that the holes align with the Push-Pull Wires by moving the Selector in or out as shown.
7. Install the new ACA Trimmer Module and insert the Push-Pull Wires back into the module holes as shown.
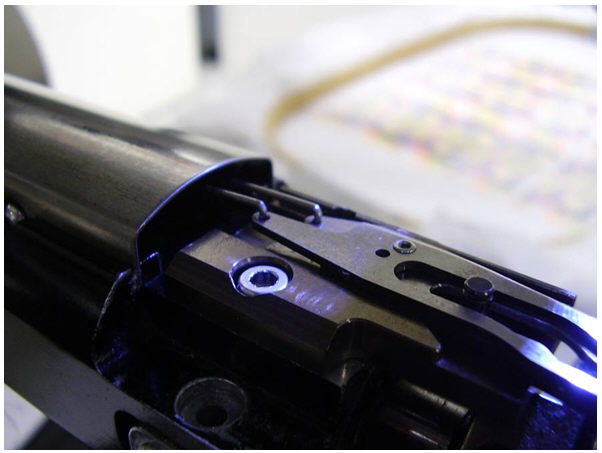
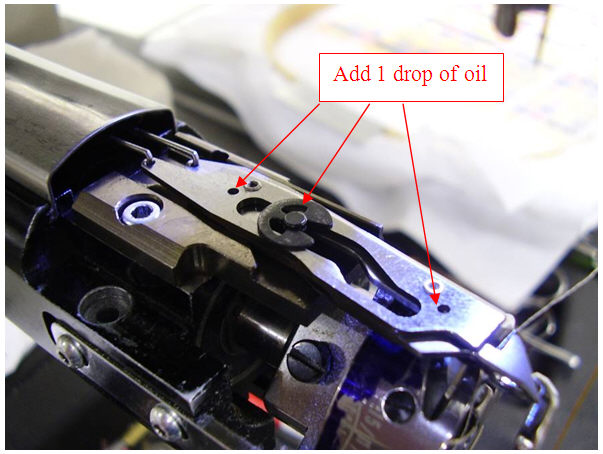
8. Using a screwdriver snap the E-clip back onto the Trimmer Pin. Add one drop of machine oil to the 3 locations shown.
9. Press any button on the Keypad to retract the ACA Trimmer Module back to the home position.
10 . Re-install the Needle Plate.