
Introduction
The CCF is designed to embroider on caps of most sizes and shapes, by attaching to the Red or Graphite Driver. The maximum embroidery field for the CCF is 2.75" (70 mm) X 6.00" (152 mm).
Hooping With the CCF
This section provides hooping information for the CCF conventional cap frame.
|
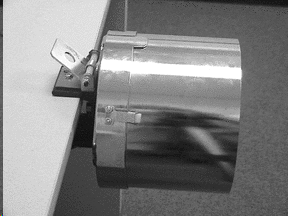
1. To make hooping fast and easy, use the cap gauge supplied in the Wide Angle Cap Frame option. |
 |
|
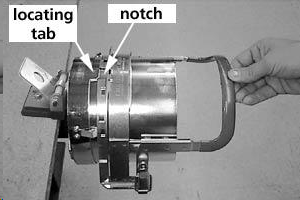
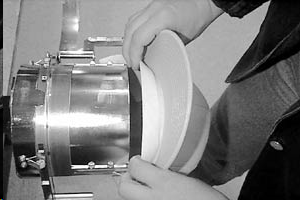
2. Slide the cap frame onto the gauge, making certain the locating tab on the cap gauge fits into the cap frame's notch, and the cap frame slips firmly under the two roller clips. |
 |
|
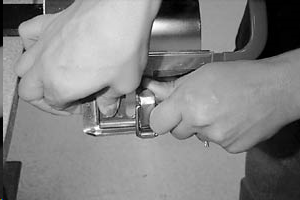
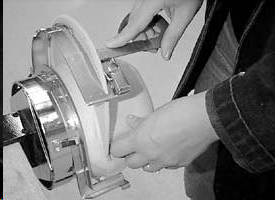
3. Unlatch the cap frame strap from the support by pressing on the metal at the end of the strap adjacent to the latch and lifting the latch lever to unlock it. Remove the latch wire from the hook. 4. Lift the strap at the latch and swing it open around the hinges at the right side of the cap frame. 5. If using backing, you must have a length that is at least 11 inches long so it will be captured by the teeth at each of the supports at the sides of the cap frame. |
 |
|
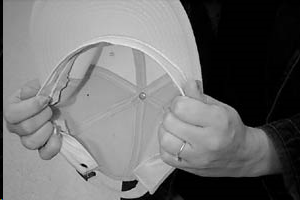
6. Obtain the cap and turn the sweat band completely out as shown. |
 |
|
7. To attach the backing, you may use one of several methods. One method, described here, is to position a piece of backing cut approximately 4 1/2" by 11" inside the cap. The backing should cover the sweat band as well as the inside of the cap crown as shown. Other methods use double-back tape or spray adhesive directly on the cap frame to hold the backing. |
 |
|
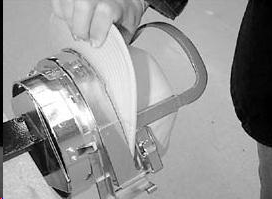
8. Slide the cap onto the cap frame with the visor facing upward and toward the rear. |
 |
|
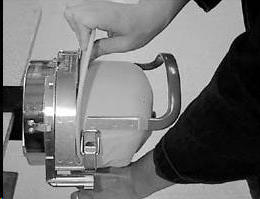
9. Insert the cap visor into the slot in the cap frame strap as you swing the strap over the front of the cap. |
 |
|
10. With the strap not latched and still loose around the cap, center the front of the cap to the middle of the cap frame. |
 |
|
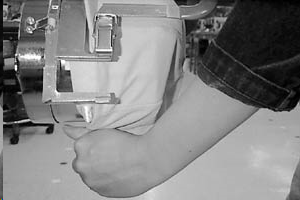
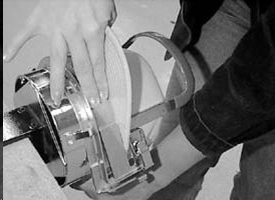
11. Leaving your right hand free to perform the next step, grasp and gather the sweat band with your left hand and pull it downward to snug the front of the cap tightly around the cap frame supports. |
 |
|
12. While maintaining the cap visor centering and front snugness as described in the previous two steps, you must now perform three basic functions in unison with your right hand: ● Push down on the end (top) of the visor to seat it against the top of the cap frame support. |
 |
|
● |
 |
|
● |
 |
|
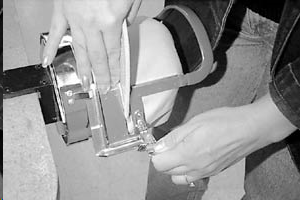
13. While holding the cap frame strap down around the sweat band, release the rear of the cap with your left hand and attach the strap latch wire over the hook on the support. |
 |
|
14. Using a visor holder is optional, and one is not included with the CCF cap frame option. If a visor holder is purchased and installed, position the cap's visor in the holder at this time. |
 |
|
15. Remove the cap frame with hooped cap from the cap gauge and move to the already installed Wide Angle Cap driver.
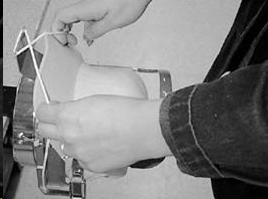
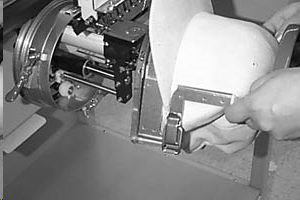
16. To remove the cap from the cap frame after embroidery is complete, unlatch the cap frame strap from the support by pressing on the metal at the end of the strap adjacent to the latch as shown. Do this as you lift on the latch lever to unlock the latch and remove the wire from the hook. The cap is now free to remove from the frame. |
 |